← Back to all Waiheke Island walks
Quick Facts
| Distance | 4.8 km return |
| Time | 1.5-2 hours |
| Difficulty | Moderate |
| Dogs | NOT ALLOWED |
| Parking | Free at road end |
| Track Closure | August 1 – September 30 (lambing) |
| Mobile Coverage | OK at the top |

This walk’s a proper adventure – you’ll climb through farmland to reach New Zealand’s best-preserved WWII coastal defence site, wander among massive ancient boulders, and explore underground tunnels dug by hand during the war. The views across the Hauraki Gulf are mint, and the history’s fascinating. It’s remote, there’s a decent climb, and you need a car to get here, but it’s absolutely worth it.
I reckon this is Waiheke’s most unique walk. You’re not coming here for beaches or vineyards – you’re coming for military history, weird geology, and that feeling of being at the edge of the island where tourists don’t usually venture.
Note: The underground tunnels require a guided tour (bookings essential). The reserve, gun emplacements, and boulder field are free to explore anytime.
Getting There
Starting Point: Stony Batter Road car park, Man O’ War Bay GPS: -36.7428°S, 175.1383°E
This is at the far eastern end of Waiheke – about 40 minutes’ drive from Matiatia Ferry Terminal through beautiful countryside.
Driving Directions from Matiatia:
- Follow Ocean View Road through Oneroa (10 minutes)
- Continue through Ostend (20 minutes total)
- At Onetangi, turn right onto Waiheke Road (heading uphill)
- After 2-3 km, turn left onto Man O’ War Bay Road
- Follow Man O’ War Bay Road through farmland for about 5 km
- Turn left onto Stony Batter Road (signposted)
- Drive to the end where there’s a car park at a gate
Public Transport: There’s NO regular bus service out here. Your options:
- Eastern Explorer hop-on-hop-off bus (pre-book online – limited seats, runs hourly in season)
- Rental car from Matiatia Ferry Terminal
- Taxi (expensive – about $80-100 each way from Ostend)
- Your own boat to Man O’ War Bay, then it’s a steep walk up
Parking: Free parking at the end of Stony Batter Road. There’s room for maybe 10-15 cars. It gets busy on weekends and during school holidays – come early.
The Route – Step by Step
This is an out-and-back walk along a farm road through private farmland to reach the DOC reserve at the top. The track’s well-defined but crosses working farmland, so respect the rules.
CRITICAL: Track closed August 1 – September 30 for lambing season
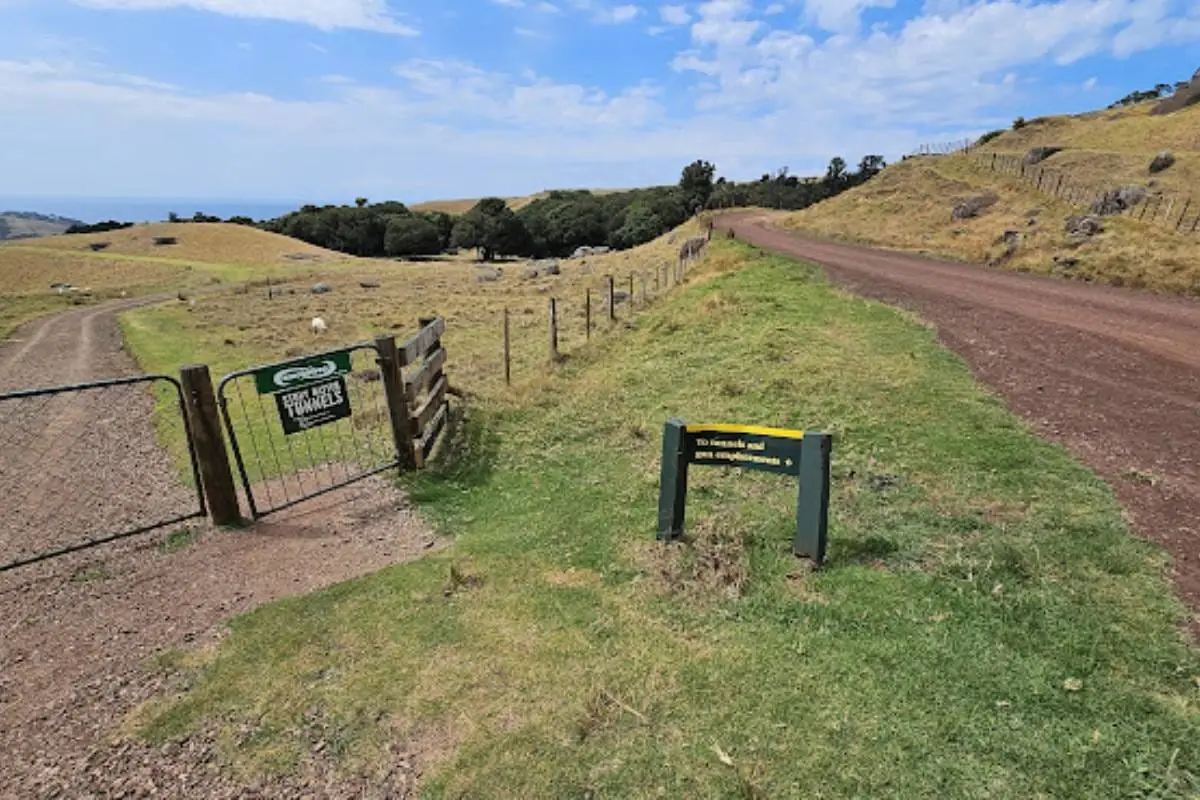
1. Car Park to Farmland Climb (0-0.8 km, 20-25 minutes)

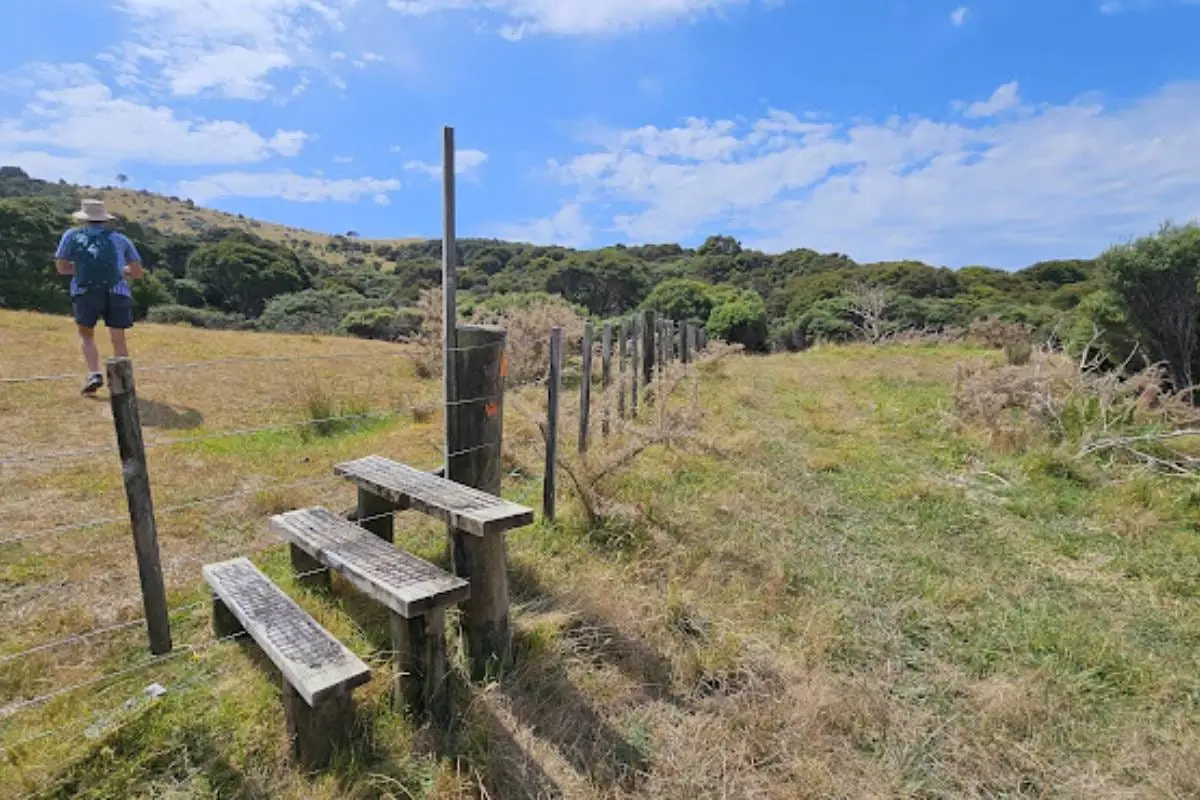
From the car park, walk through the gate (close it behind you – this is working farmland with sheep and cattle). The farm road immediately starts climbing. This first section’s the workout – you’re gaining about 150-180m elevation over the next 800m.
The road’s a well-maintained gravel track. Follow the main farm road – it’s obvious. You’ll pass through open farmland with sheep grazing. The cows can be curious, so give them space but they’re generally chilled.
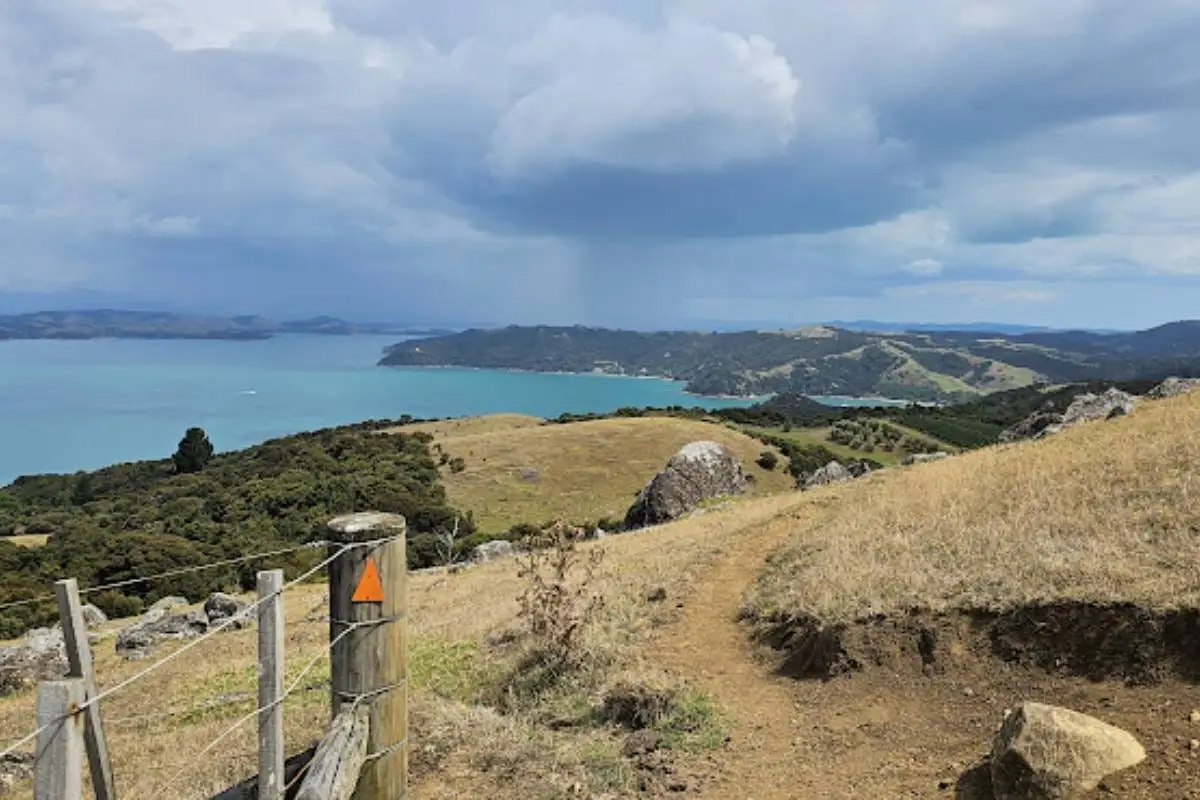
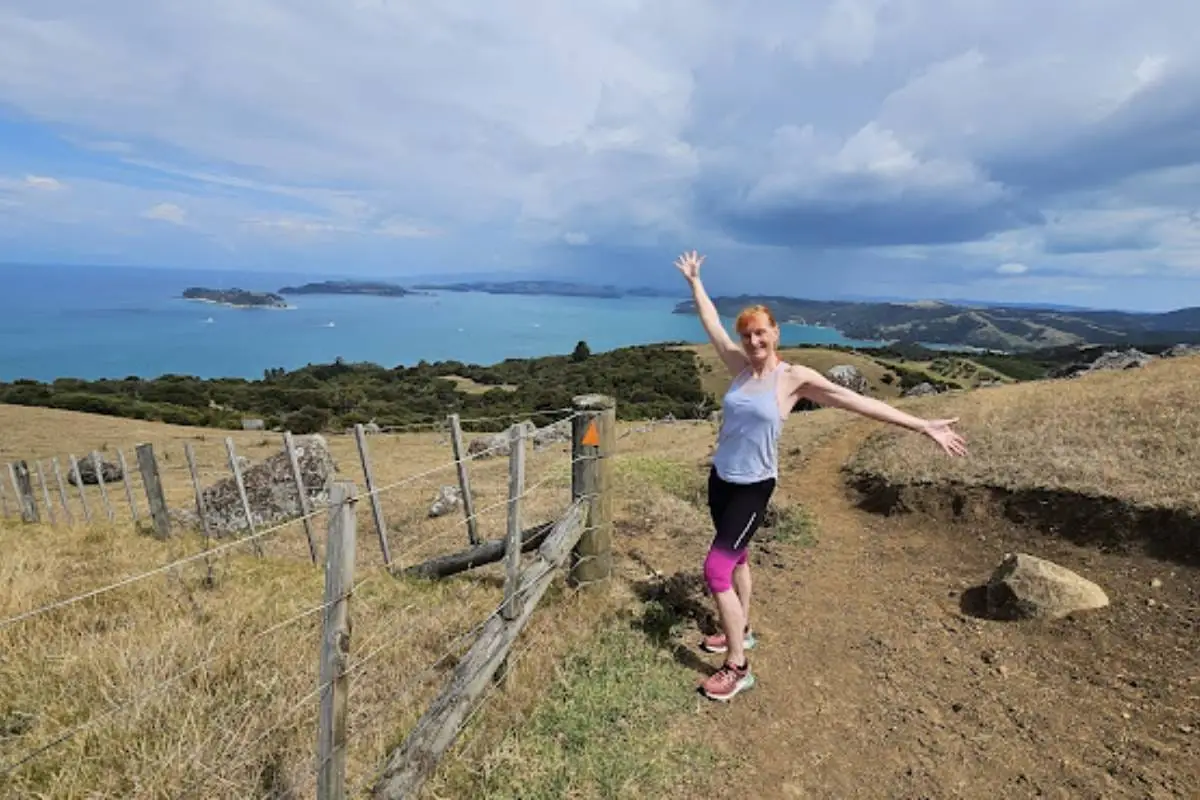
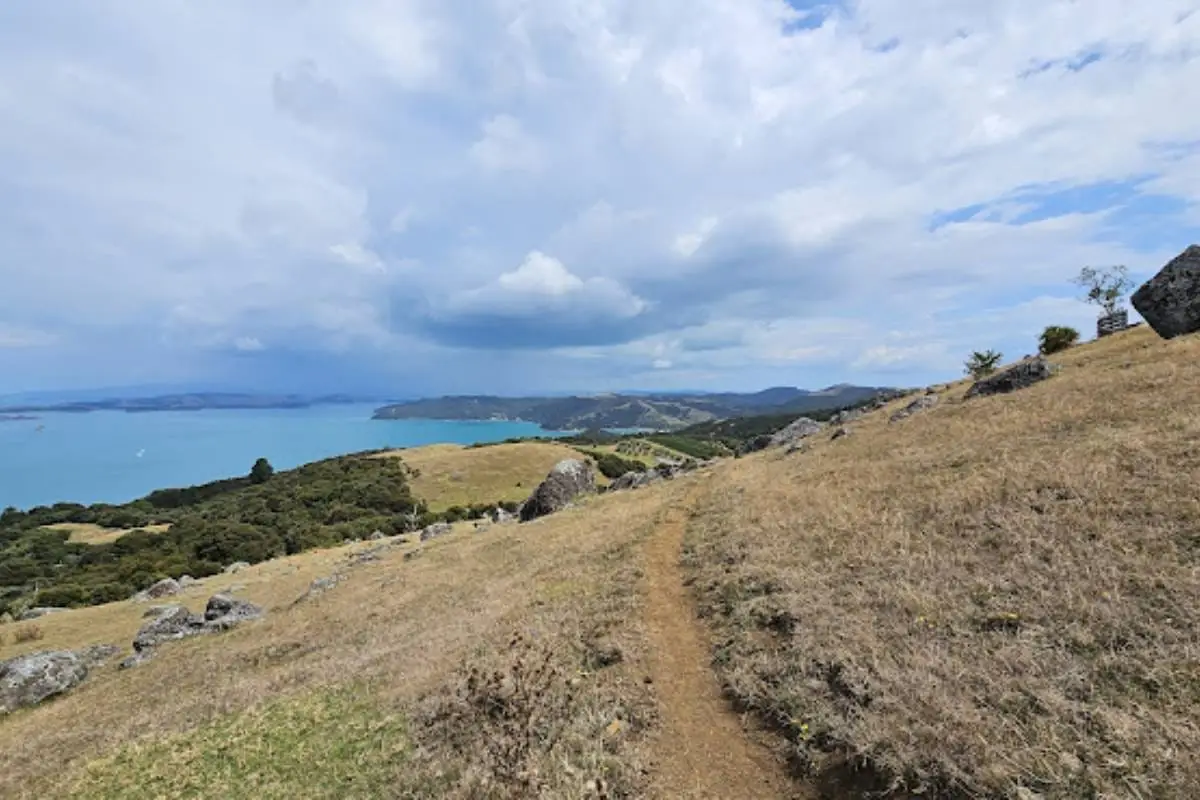
Views start opening up behind you – turn around occasionally to see the Hauraki Gulf spreading out. On a clear day, you can see Coromandel Peninsula to the east.
2. Through the Farmland (0.8-1.6 km, 15-20 minutes)
The climb eases off a bit. You’re walking through gorgeous rolling farmland now, with native bush remnants on your left (west side). The boulders start appearing – massive andesitic rocks scattered across the hillside like a giant’s marbles.
These boulders give Stony Batter its name. They’re remnants of an 8-million-year-old basalt volcano, and they’re weirdly fascinating. Some have karst features (water-erosion patterns), which is super rare with basalt rock.
Keep following the farm road. At about 1.5 km, you’ll reach an intersection where the road forks. Veer right and uphill towards the reserve entrance.

3. Entering Stony Batter Historic Reserve (1.6-2.4 km, 10-15 minutes)
You’re now in the DOC-managed Stony Batter Historic Reserve. The landscape changes dramatically – you’re surrounded by massive boulder outcrops and ancient volcanic rock formations.
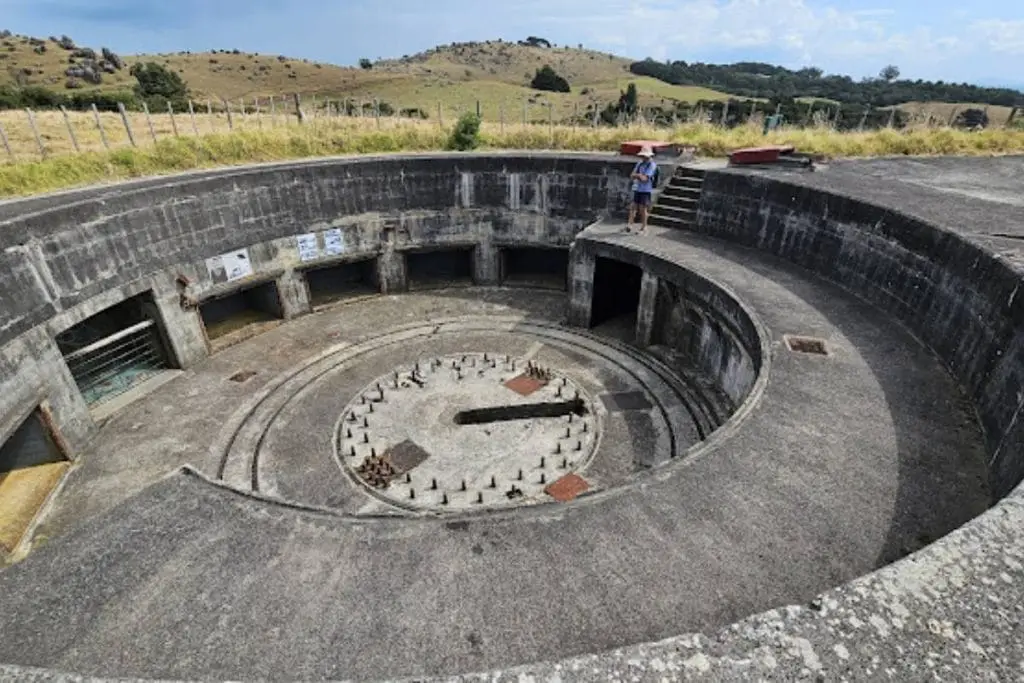
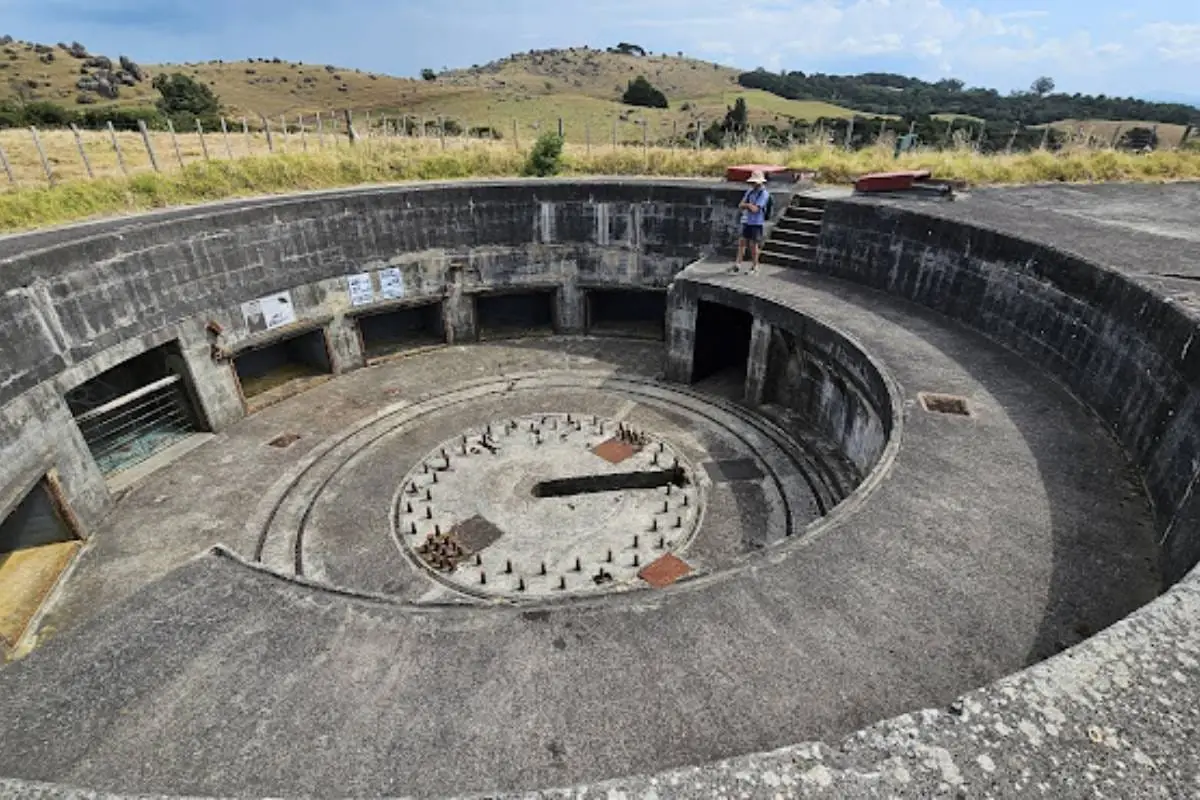
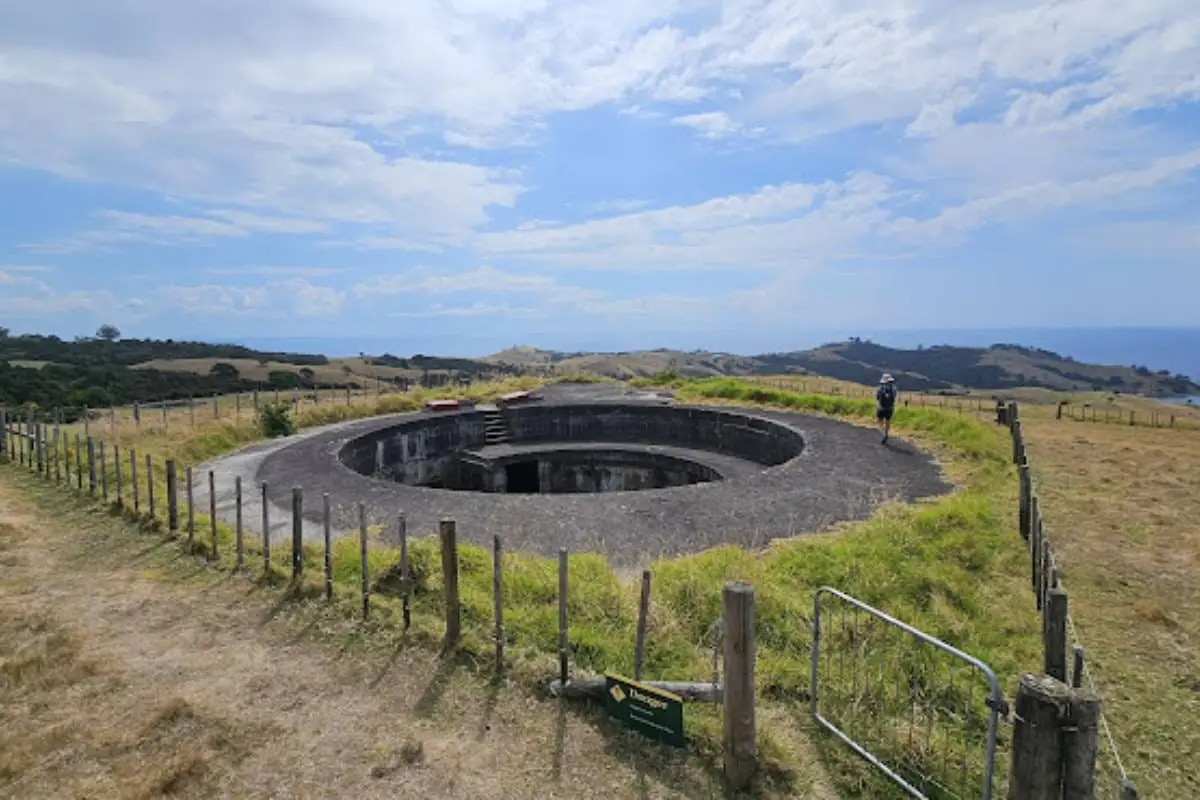
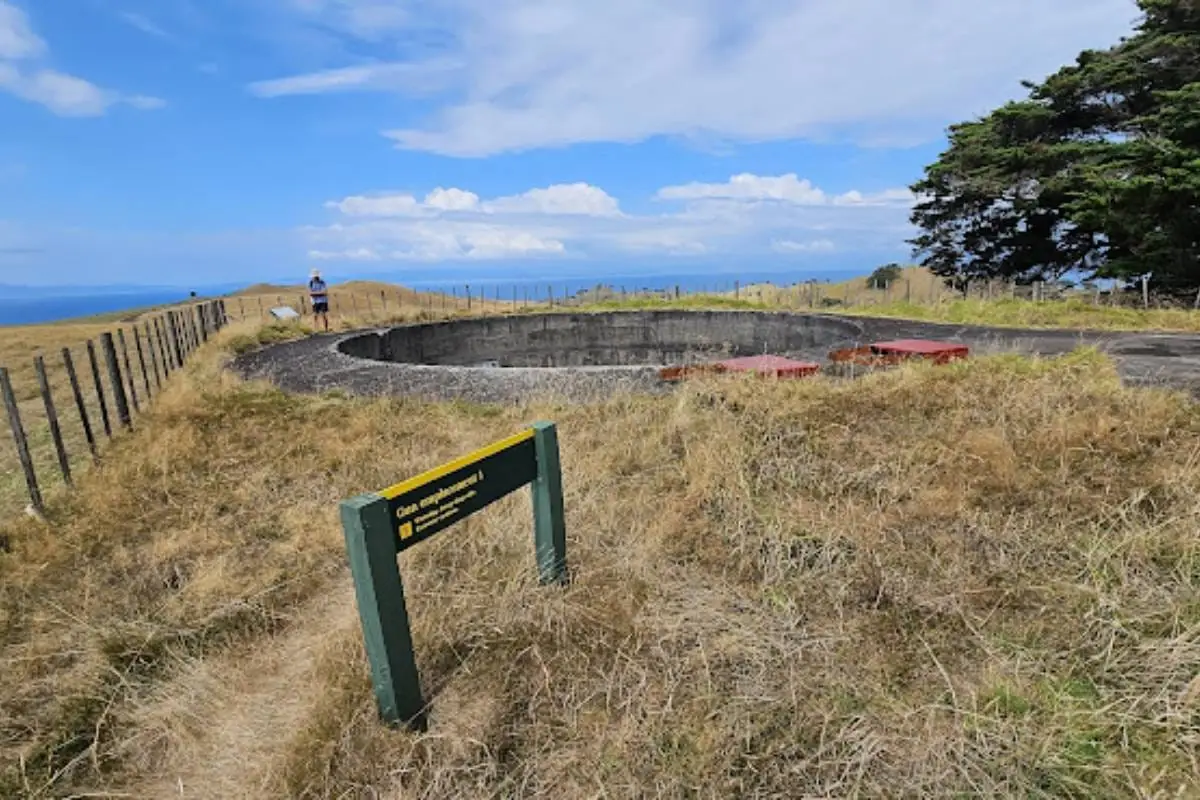
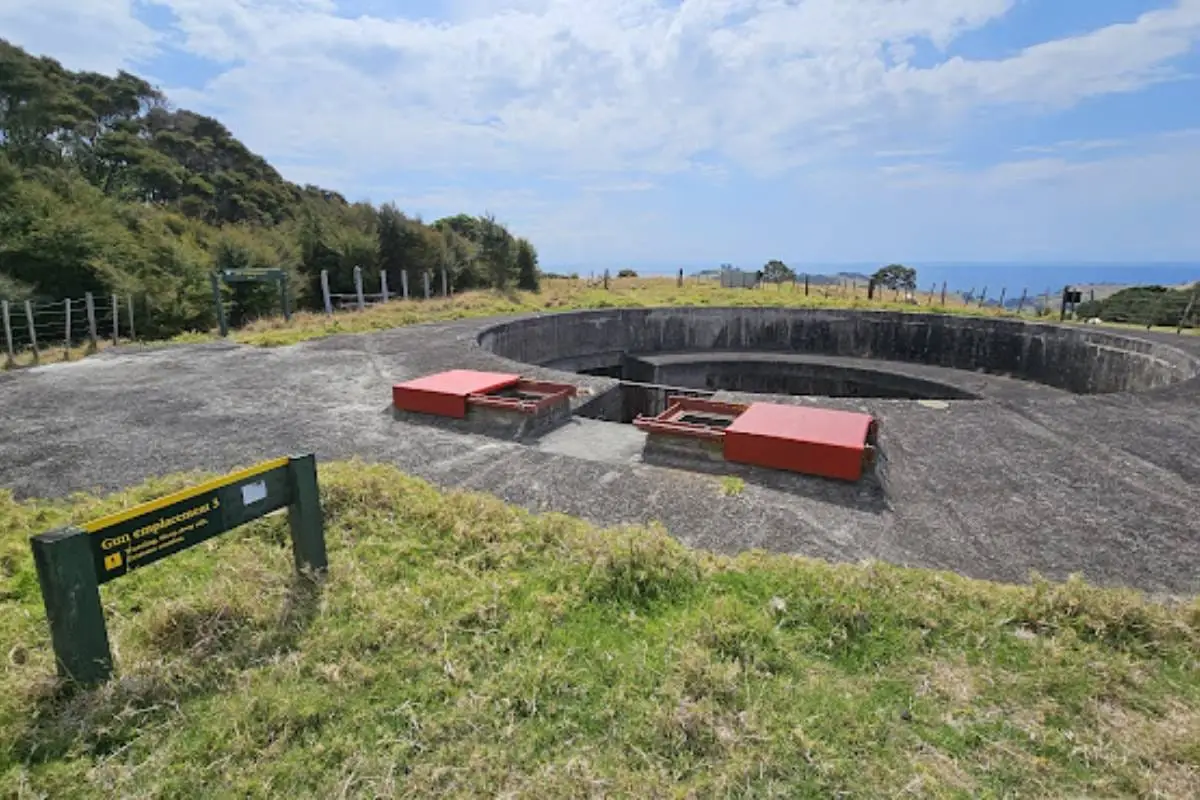
The first thing you’ll notice is the concrete. Three enormous gun emplacements sit among the boulders like brutalist sculptures. Each one’s about 30 feet deep, built to withstand direct enemy bombardment. The scale is impressive – these were designed to house 9.2-inch guns that could hit targets 32 km away.
4. Exploring the Reserve (variable time)
Once you’re in the reserve, you can explore freely (except during tunnel tours – respect tour groups). Here’s what to check out:
- Gun Emplacements: All three are accessible. Climb down into them (carefully – there are no railings). Looking up from inside gives you a sense of the engineering involved. Looking out, you’ll understand why this site was chosen – uninterrupted views across the entire Hauraki Gulf approach to Auckland.
- Boulder Field: Wander among the rocks. Some are the size of small houses. The karst formations (those weird erosion patterns) are best seen on the boulders near the gun pits. This is a unique geological feature – basalt doesn’t usually erode like this.
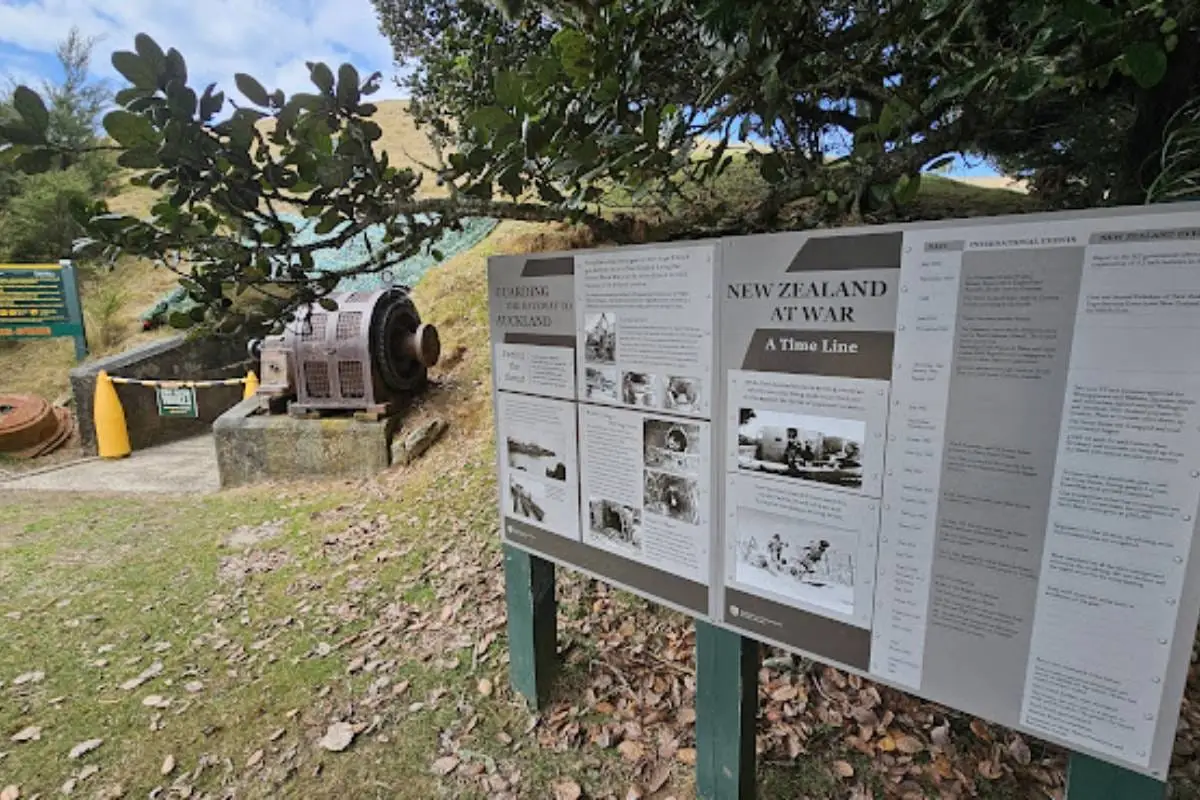
- Ventilation Shafts and Structures: Scattered around the site are various concrete structures – ventilation shafts, observation posts, the remains of workshops. Information signs explain what everything was used for.
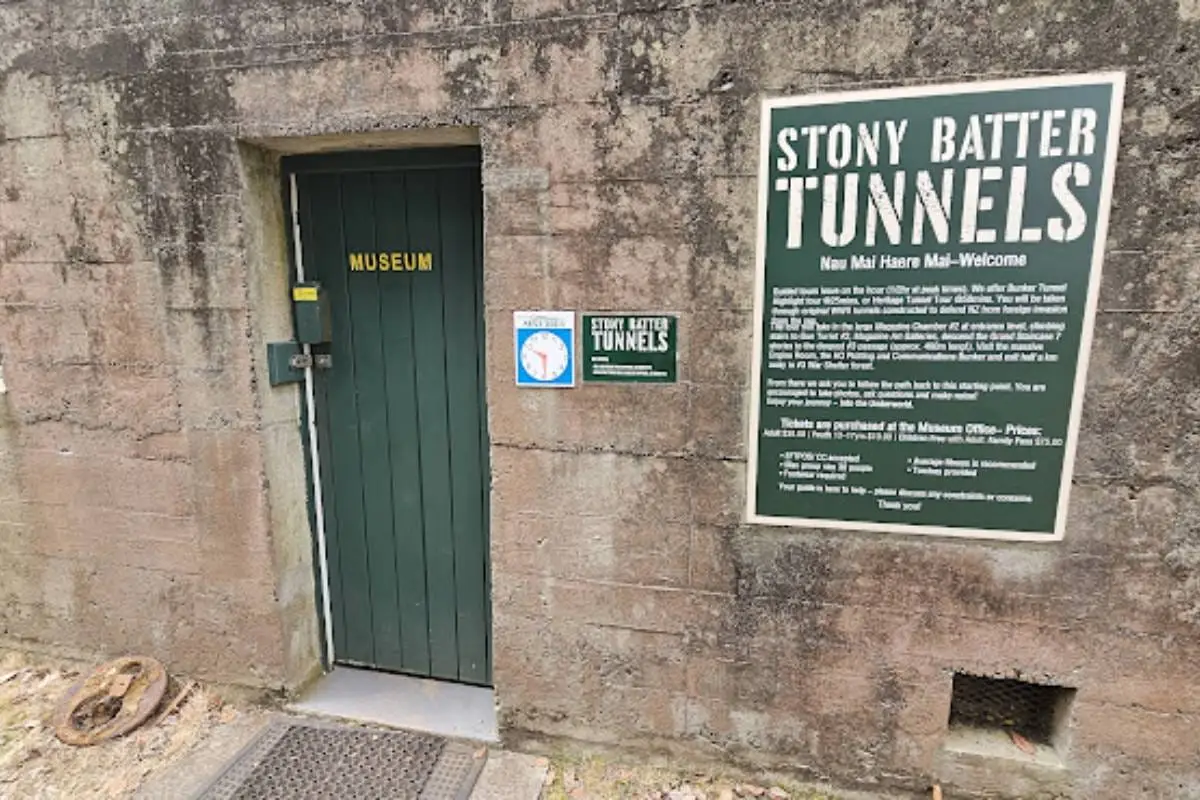
- Tunnel Entrance: The main tunnel entrance is clearly marked. This is where the guided tours enter. The tunnels themselves run for 1.2 km underground, connecting the gun emplacements with ammunition stores, engine rooms, operations rooms, and living quarters. If you’ve booked a tour (highly recommended), your guide will meet you here.
- Views: From the reserve, you can see right across to Coromandel, Kawau Island, Motuihe, Motutapu, and Rangitoto. On clear days, it’s spectacular.
5. Return Journey (2.4 km back to car park, 40-50 minutes)
Retrace your steps down the farm road. The descent’s much easier, though watch your footing on the gravel. The views on the way down are different – you’re looking out to sea now rather than at your feet during the climb.
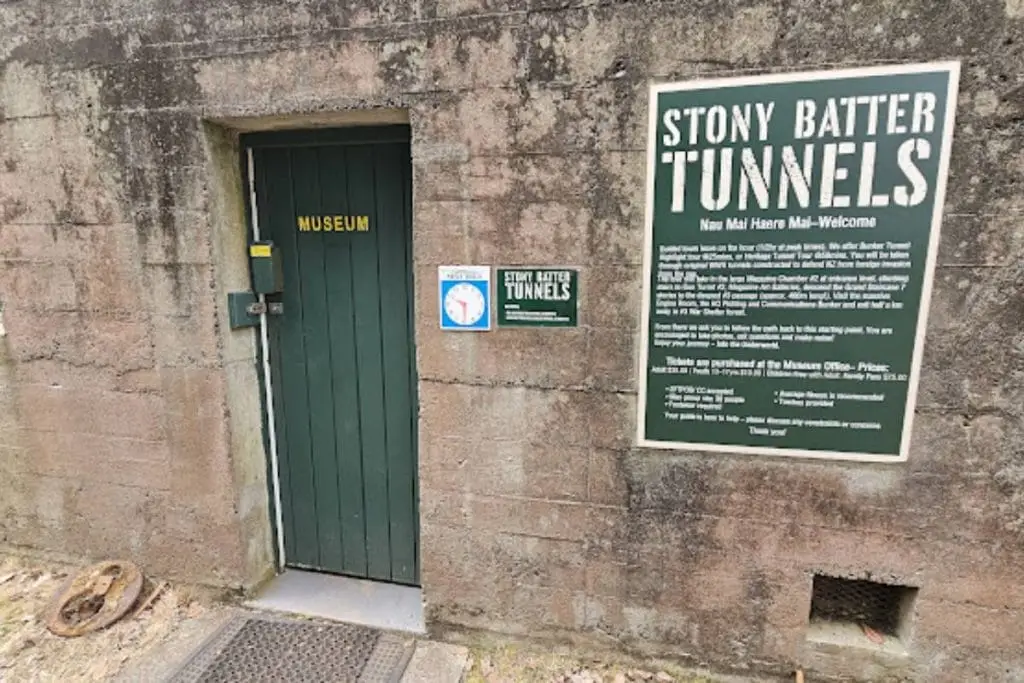
Tunnel Tours – Essential Information
The underground tunnel system is the real highlight of Stony Batter. While you can enjoy the walk and see the gun emplacements without a tour, going underground is where the history comes alive.
Booking: You MUST pre-book tours through www.stonybattertunnels.nz or phone +64 21 483 425. Tours fill up quickly, especially in summer and on weekends.
Tour Times: Thursday-Sunday, tours run from 10:30am (first tour) to 4:15pm (last tour) Tours run every 30 minutes Closed Monday-Wednesday
Cost: Around $30-35 per adult (check website for current prices and family rates)
What You’ll See:
- 1.2 km of hand-dug tunnels and passages
- 13 underground chambers (some are bigger than houses)
- Magazine storage rooms where ammunition was kept
- The engine room with original machinery
- Operations rooms and plotting room where ranges were calculated
- Command bunker
- Barrack rooms (partially restored)
- Art installations and exhibitions
Tour Duration: About 60-90 minutes underground
What to Bring:
- Closed walking shoes (essential – no sandals or jandals)
- Warm layer (it’s cool underground year-round)
- The tunnels are well-lit now, but some people like to bring their own torch
Accessibility: The tunnel tours involve stairs and uneven surfaces. Not suitable for wheelchairs or those with significant mobility issues. Check with operators about specific concerns.
What You’ll Actually See
History: This is New Zealand’s largest and best-preserved WWII coastal defence installation. Built in absolute secrecy between 1943-1945 to protect Auckland from Japanese invasion, the whole complex was designed to take direct enemy fire. The three 9.2-inch guns could fire shells 32 km – far enough to reach from Waiheke to Coromandel. They were test-fired once in 1951, and the blast broke windows in Coromandel Town, 30 km away. The guns were never used in combat and were scrapped in the 1960s.
Geology: The boulder field is genuinely unusual. These massive andesitic boulders are remnants of an 8-million-year-old volcano. The karst erosion patterns (where water has carved weird shapes into the rock) are extremely rare on basalt. The builders used these boulders as aggregate for the concrete – practical and clever.
Views: From the reserve, you’re looking at one of the best panoramas on Waiheke:
- North and east: Coromandel Peninsula across the water
- North: Kawau Island (you can see why this was a strategic defence point)
- West: Motuihe, Motutapu, and Rangitoto islands
- Below: Man O’ War Bay and the eastern coastline
Wildlife: The reserve has resident weka (native flightless birds – they’re curious and will check you out), native lizards (geckos), and plenty of birdlife in the bush remnants. The surrounding farmland has sheep and cattle.
Native Bush: There are three significant bush blocks within the reserve, protecting remnant native forest. You’ll see puriri, pohutukawa, and various coastal species.
Track Surface and Conditions
Surface:
- 2.4 km farm road: Well-maintained gravel/dirt (good footing)
- Reserve area: Grass and rough ground around boulders (uneven, watch your step)
- Inside gun emplacements: Concrete (can be slippery when wet)
The Climb: Don’t underestimate this walk. The first 800m gains 150-180m elevation – that’s a proper climb. It’s not technical, just relentlessly uphill. If you’re reasonably fit, you’ll manage fine, but you’ll feel it.
Muddy Sections: The farm road can get muddy and slippery after rain. The grass sections around the boulders can be soggy in winter. Wear proper walking shoes with grip – this is NOT a walk for jandals or smooth-soled shoes.
Exposure: Once you’re out of the bush on the climb, you’re completely exposed to sun and wind. The top can be seriously windy – bring a windbreaker even on calm days at sea level.
Seasonal Closure: Track is closed August 1 – September 30 for lambing. This is strictly enforced. Don’t try to sneak in – the farmers need this time.
Who It’s For
Perfect For:
- History buffs (this is a must-do)
- People who like walking with a purpose beyond just views
- Anyone interested in military history or engineering
- Families with kids 10+ (younger kids might struggle with the climb and find the history less interesting)
- Visitors wanting to see the remote eastern end of Waiheke
Fitness Level: Moderate. The climb requires decent fitness. If you can walk uphillfor 20-25 minutes without stopping, you’ll be fine. The descent’s much easier.
Not Ideal For:
- Anyone with mobility issues (steep climb, uneven surfaces)
- Very young children (the climb is tough, and they’ll be bored by the history)
- People who just want an easy coastal stroll
- Anyone not interested in history (the walk itself is good, but the history is the main draw)
Kids: Kids 10+ who like exploring will love this – the tunnels, gun emplacements, and boulders are like a giant playground. Younger kids will struggle with the climb and attention span for the history. The tunnel tours are fascinating for kids interested in war history.
Accessibility: Not accessible for wheelchairs or strollers due to the steep farm road and rough terrain in the reserve.
When to Go
Best Times: This walk’s good most of the year, but timing matters:
Spring (September-November): Perfect. Mild temperatures, wildflowers, and you’ll miss the worst of summer crowds. Just check lambing closure dates – track reopens October 1.
Summer (December-February): Busy but beautiful. Come early (aim to start by 9am) to beat the heat – there’s minimal shade on that climb. The reserve gets hot, and you’ll be glad of morning coolness. Tunnel tours book out quickly in summer, so reserve well ahead.
Autumn (March-May): Excellent. Weather’s still good, fewer visitors, and the afternoon light is gorgeous for photos. Less wind than summer.
Winter (June-August): Track is closed August-September, but June-July is fine if you don’t mind cold and wet. The climb will warm you up, but the top can be brutal in strong winds. Good for avoiding crowds, but check weather carefully. Tunnel tours may have reduced hours.
Time of Day:
- Morning (9-11am): Best for the climb – it’s cooler and the light’s better for photos
- Midday: Hot and exposed – not ideal for the uphill slog
- Afternoon: Good for exploring the reserve (you’ll be in shade of boulders), but allow enough time before sunset
- Sunset: Not recommended – you’ll be walking down in fading light on an uneven farm road
Avoid Crowds: Weekdays are way quieter than weekends. If you can visit Tuesday-Thursday, you’ll often have the place to yourself outside of tour times.
Important Stuff
Dogs: ABSOLUTELY NOT ALLOWED
No dogs on this walk, full stop. This is:
- DOC land (no dogs permitted)
- Private farmland with sheep (dogs would cause havoc)
- A historic reserve with strict rules
Leave your dog at home or in your accommodation. This is non-negotiable.
Land Access: The farm road crosses PRIVATE farmland owned by Man O’ War Station. You’re walking on a public accessway, but the land either side is private. The reserve itself is DOC land.
Rules:
- Close all gates behind you
- Stay on the farm road – don’t wander into paddocks
- Don’t disturb stock (sheep and cattle)
- Take all rubbish with you
- Don’t climb on the heritage boulders (erosion damage)
- Don’t touch or remove anything from the gun emplacements or military structures
Facilities:
- Toilets: NONE at Stony Batter. Nearest toilets are at Man O’ War Vineyard (5 km back down the road) or Onetangi (20 km). Go before you leave.
- Water: None available. Bring plenty – you’ll need at least 1 liter per person, more in summer.
- Picnic areas: Plenty of grass around the boulders to sit and eat. No tables or shelters. It’s all weather-exposed.
- Shade: Minimal. Some shade around the bush blocks and boulders, but the walk up is fully exposed.
Safety:
- Mobile coverage: Patchy to none once you leave the main road. Don’t rely on your phone for emergencies.
- Weather: Conditions can change fast. The top gets seriously windy – bring warm layers even in summer.
- Gun emplacements: No railings or safety barriers. Watch your footing, especially with kids.
- Heat exhaustion: In summer, that exposed climb is brutal. Bring sun protection and water.
- Emergency: If you get into trouble, the nearest help is Man O’ War Bay (back down the road, about 6 km).
What to Bring:
- Plenty of water (1-2 liters per person minimum)
- Snacks/lunch (no shops or cafes nearby)
- Sun protection (hat, sunscreen, sunglasses)
- Windbreaker (the top gets windy)
- Proper walking shoes with grip
- Camera (the history and views are amazing)
- Cash or card for tunnel tours (if booked)
- Warm layer for tunnel tour (it’s cool underground)
Seasonal Closure: August 1 – September 30 annually for lambing. Don’t ignore this – the farmers need it, and you’ll be trespassing.
My Honest Take
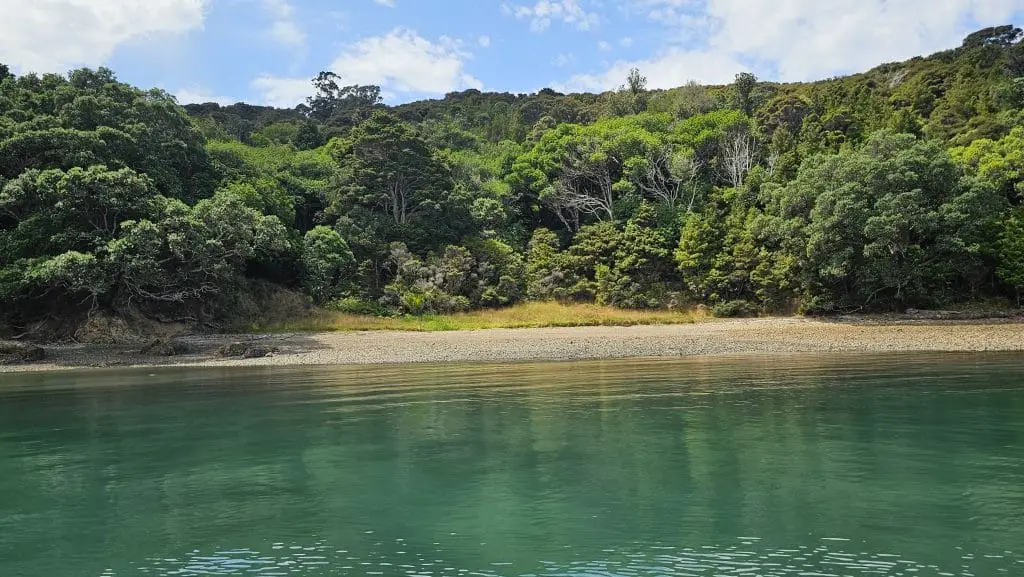
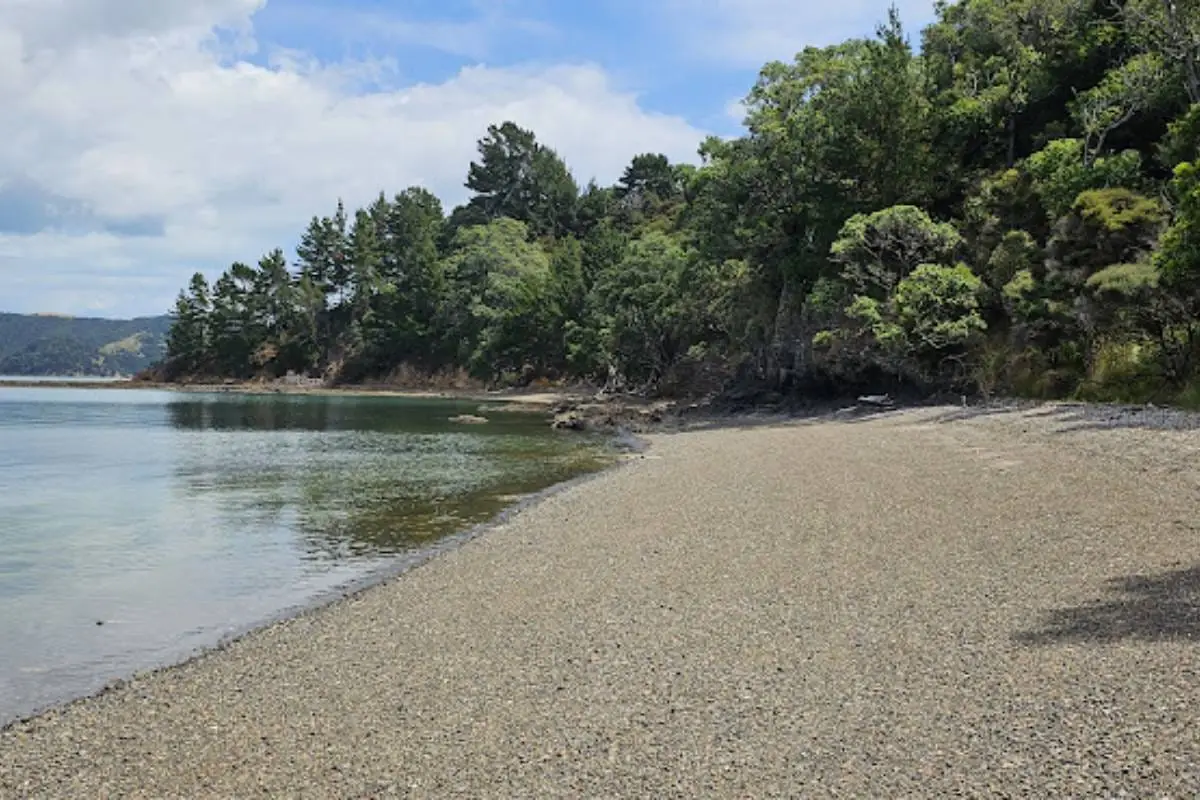
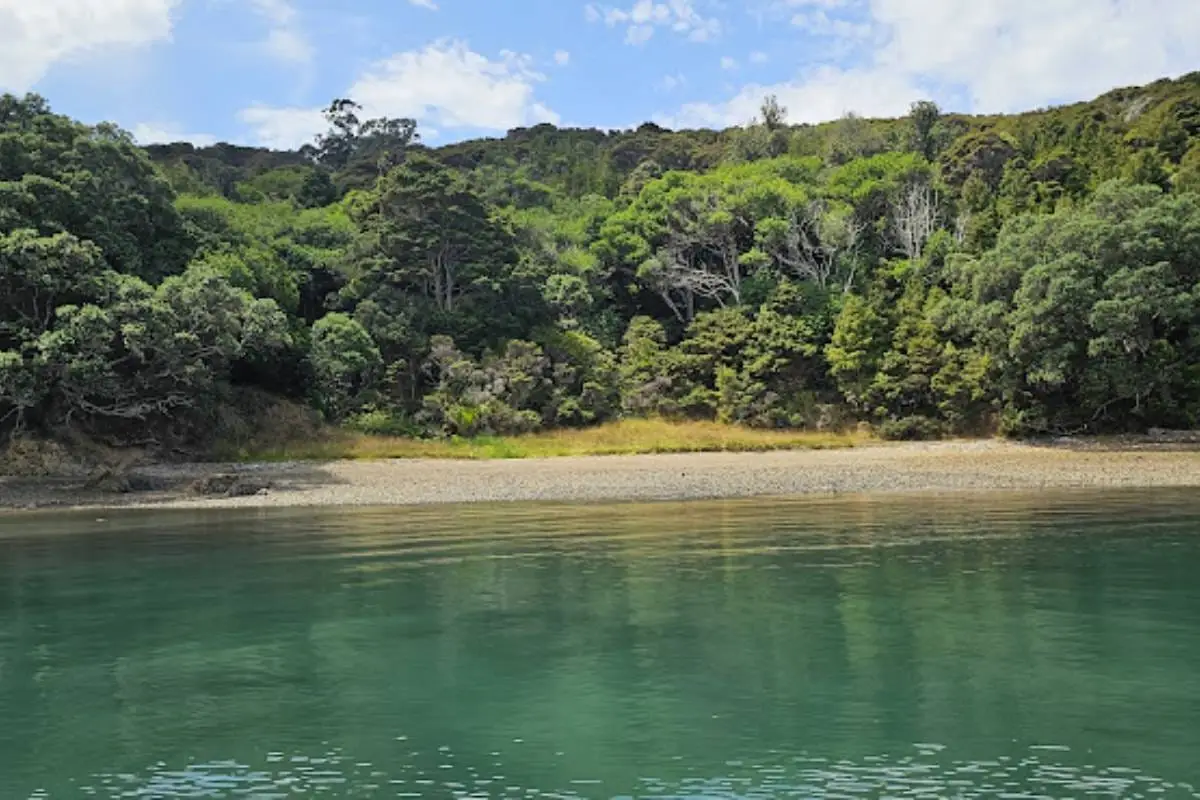
I actually came in by boat, which totally changed the experience. We anchored at this gorgeous little unnamed beach right between Opopo Bay and Man O’ War Bay – it’s marked on my 3D map. Starting from sea level on the beach made that climb even more brutal than coming from the car park, but arriving by water felt properly adventurous. The beach itself was stunning, and having it basically to ourselves was mint.
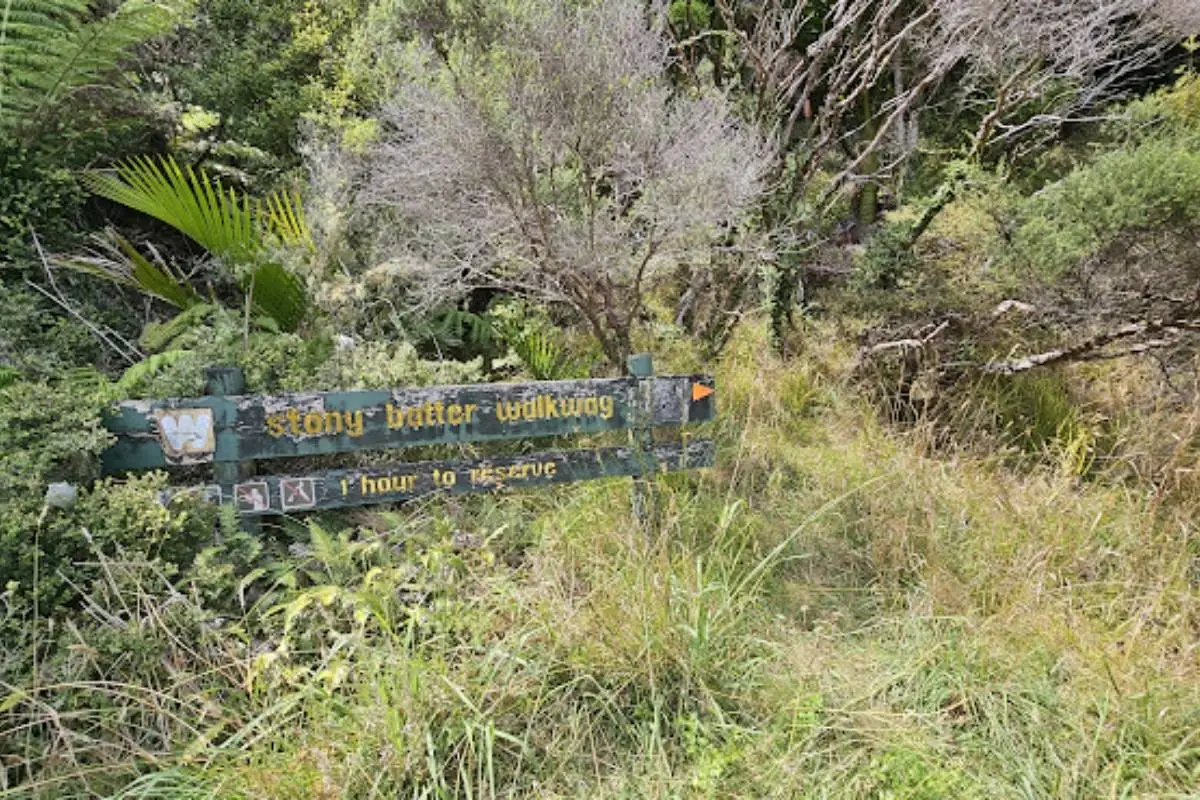
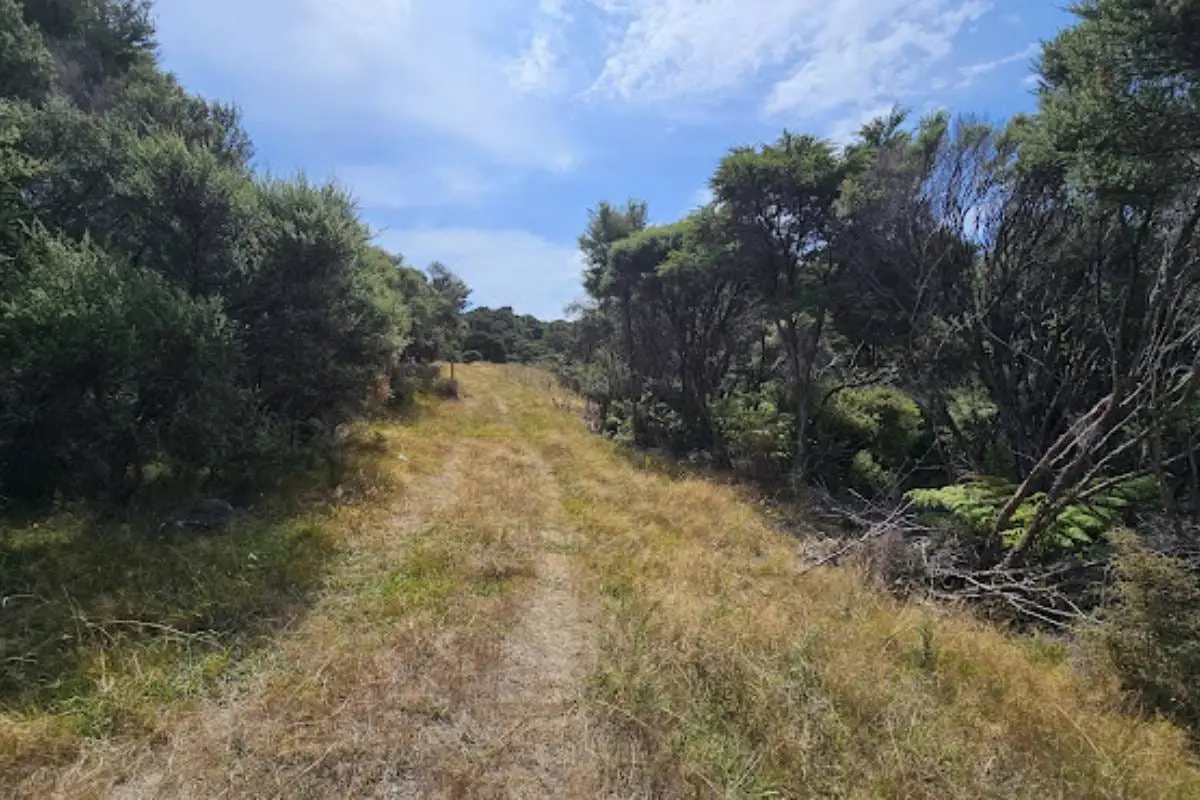
The walk description above is from the standard car park start (which is what most people do), but if you’ve got access to a boat, I’d 100% recommend the beach route. You’ll see a slightly hidden track sign (grass was growing over it when we visited) right at the beach. The claim is it takes an hour to the reserve, but we knocked it out in about 45 minutes – though we’re reasonably fit and didn’t stop much.
Fair warning though – starting from the beach means you’re climbing from sea level rather than from the car park elevation, so it’s a bigger workout. But the sense of remoteness is incredible. You feel like you’re discovering something hidden rather than just following the tourist trail.
Once we reached the reserve, I was blown away. I’d seen photos of the gun emplacements and thought “yeah, looks interesting,” but being there is completely different. The scale of the military engineering is mind-blowing – these tunnels were dug BY HAND through solid rock during wartime. The fact they’re so well-preserved makes it even better.
Wandering among those massive boulders with the gulf spread out below felt like we’d discovered something special. The remoteness added to it – whether you arrive by boat or car, you’re at the far edge of Waiheke where most tourists never go. The cows in the paddocks were curious but chilled, which was entertaining.
On the return, I walked back down to the beach, and the weather was so lovely I just swam out to the boat instead of getting back in the dinghy. That’s one of the best things about the beach approach – you can cool off with a swim after that sweaty climb. You’re not getting that option from the car park!
I didn’t do the tunnel tour on that visit (the tunnels were closed when I went), but I’ve been back since and the tours are brilliant. The guides are passionate about the history and full of stories. Seeing the engine rooms, plotting rooms, and ammunition stores brings the whole war defence story to life. The chambers are genuinely huge – way bigger than I expected underground.
The downside? Unless you’ve got a boat like we did, you need a car. There’s no easy public transport option, and it’s too far to cycle unless you’re keen. Also, if you’re not into history, you might find it a bit meh – this walk is 60% about the WWII story and 40% about views and geology. If you just want a beach walk, go elsewhere.
Would I do it again? Already have! The boat approach was brilliant, but I’ve also done it from the car park since. Both are good – the boat feels more adventurous, the car park is more practical.
Who’d I recommend it for?
- Anyone into military history (it’s a must-do)
- People with boats looking for a walk from a remote beach
- People who want to see the remote eastern end
- Families with older kids who like exploring (though car park start is easier with kids)
- Visitors who’ve done the standard Waiheke walks and want something different
- Anyone fascinated by engineering or geology
Skip it if:
- You’re not interested in history
- You want an easy, flat coastal stroll
- You don’t have transport (car or boat)
- You’re time-poor (the drive alone is 40 minutes each way from the ferry)
- You’ve got mobility issues with the climb
Other Walks Nearby
Eastern End Options:
- Stony Batter to Hooks Bay – 2.5 km one-way, 2 hours return, Moderate Extension from Stony Batter down to a gorgeous isolated cove. Rough track across farmland – no formed trail, follow orange posts. Note: Also closed August 1 – September 30. [Link to walk]
- Stony Batter to Opopo Bay – 2.5 km one-way, 2 hours return, Moderate
Another extension option heading south from the gun emplacements. Beautiful orange-sand bay. Track closes during lambing season. [Link to walk] - Man O’ War Bay Beach – Free access If you’re out this far, stop at Man O’ War Bay beach (passed on the drive). Good for swimming and there’s the excellent Man O’ War Vineyard for lunch with views.
Back Towards the Main Island:
- Onetangi Beach to Man O’ War Bay – 14.3 km one-way, 5-6 hours, Moderate-Hard The epic coastal walk that ends near Stony Batter. You could combine this with Stony Batter as a very long day.
- Whakanewha Loop – 4.9 km loop, 2 hours, Easy-Moderate On the south coast, about 30 minutes’ drive from Stony Batter. Completely different vibe – bush and wetlands.
- Church Bay Circuit – 8-8.5 km loop, 2.5-3 hours, Moderate The classic Waiheke clifftop walk, about 35 minutes’ drive back towards the west.
Connecting to Te Ara Hura: Stony Batter is part of the Te Ara Hura walkway network. The Onetangi to Man O’ War Bay walk connects with Stony Batter, and you can piece together multi-day routes exploring the eastern end.
GPS Coordinates:
- Car park: -36.7428°S, 175.1383°E
- Stony Batter Reserve: -36.7375°S, 175.1447°E
Key Contacts:
- Tunnel tours: www.stonybattertunnels.nz | +64 21 483 425
- DOC Waiheke: Check track status and closures
- Eastern Explorer bus: Pre-book online for transport
Last Updated: October 2025
